
Monday, March 14, 2016
North Texas Gamers' March 12 2016 Game Day Photos
We had regular gaming and a Twilight Struggle Tournament with 10 entrants.
North Texas Gamers' March 12 2016 Game Day Photos
Wednesday, December 4, 2013
Wednesday, August 28, 2013
August 24 Gameday


We had a good crowd at our Aug 24 gameday at Madness Games and Comics.
From my Android phone on T-Mobile. The first nationwide 4G network.
Wednesday, August 14, 2013
Cityfight - the S#@! Is about to hit the fan!

My M60s have just turned the corner onto the East-West road when they spot and are spotted by the enemy. The bad part is I'm using Bold movement so all my shots are at half-strength. Needless to say it did not end well for my side.
From my Android phone on T-Mobile. The first nationwide 4G network.
Cityfight - Soviets get first kill!

The second part of my plan was to position units of my mech infantry platoon where I thought I could get good shots at the enemy if they came down the road. In the picture I had unloaded a squad split between the stone building and woods. One of Kent's T-62s spotted and then killed one if the APCs before it had a chance to get off the road. The road going North-South leads directlt towards my exit point. It became apparent as the game progressed that Kent had it heavily guarded.
Use of light and medium anti-tank weapons from buildings is limited by the composition if the building (wood, stone, concrete) and the number of doors and windows (accessible hexsides) the building has. A building may be in a good location but be unusable if you can't fire from it.
From my Android phone on T-Mobile. The first nationwide 4G network.
Tuesday, August 13, 2013
Cityfight - Modified Tank Battle at Metalwaren
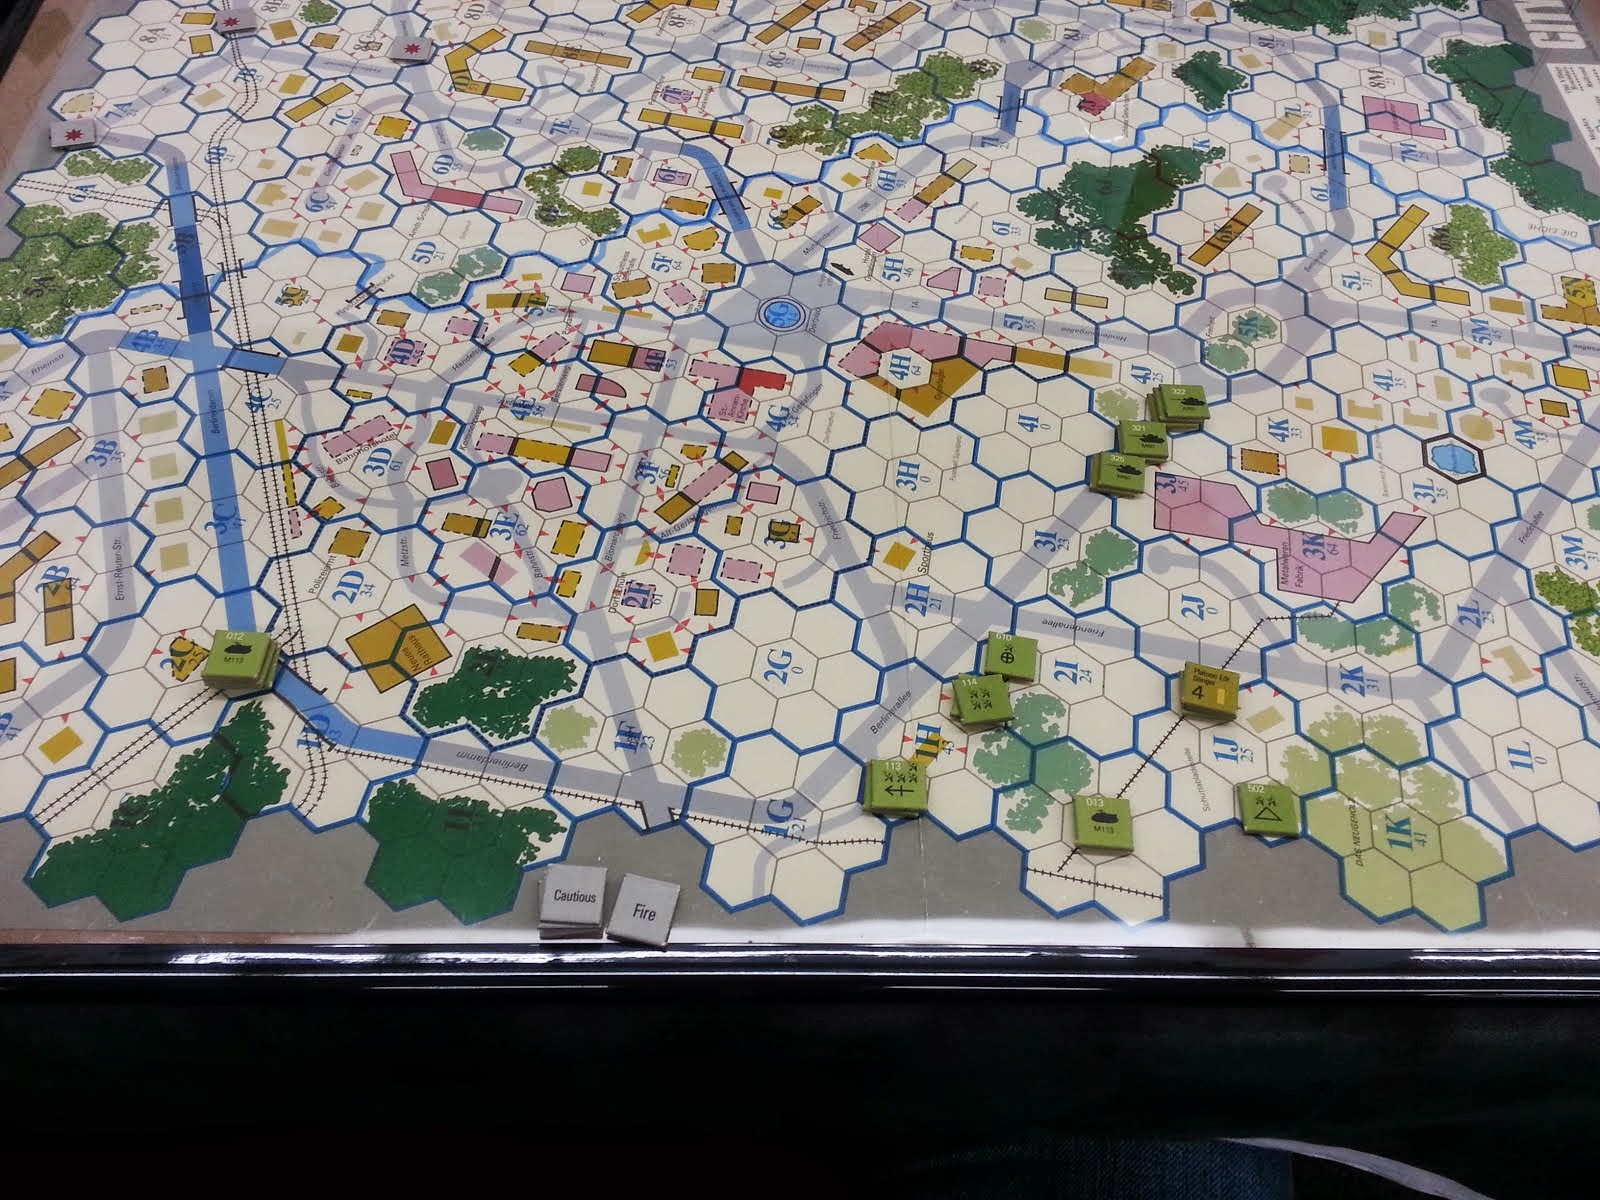
Kent and I are playing our modified version of the Tank Battle at Metalwaren scenario for the second time. We started playing this past Sunday and have completed 14 of the 20 turns.
I will post pictures from my point of view; Cityfight is a double-blind game using two identical maps. People who came up to us asking about it said it sounded like extreme Battleship on land.
The picture posted was taken at the end of turn 1. My goal is to defend the exit megahexes of 1G, 1H, and 1I and/or to try to exit undemoralized platoons off the map at any of the megahexes 0A, 9B, or 0C. The last time we played I did not try to exit any of my platoons. This time I decided from the start to attempt to exit my tank platoon off the map.
Rather than take the obvious most direct route I decide I will go around the right side of the map and then cut across the top of the map to the exit points. We shall see how that works out.
From my Android phone on T-Mobile. The first nationwide 4G network.
Thursday, August 8, 2013
Cityfight: Modern Combat in the Urban Environment

I have played two games of Cityfight recently and am scheduled to play it again this Sunday. I have really enjoyed our games. Not knowing where your opponent's units are really adds a lot of suspense to the game. We have been using the Basic and Intermediate game rules. The rules are really well written. We haven't found any problems with them.
From my Android phone on T-Mobile. The first nationwide 4G network.
Thursday, August 1, 2013
Angola! - Thoughts on Covert Military Aid

In the picture, we had just finished turn 5 and the FAPLA/MPLA Alliance has a 3VP lead. Earlier in the game we gave away 1VP when we over bid on Covert Aid and we would do it again later in the game. That is 2 free VPs for the other side! That got me to thinking in the future, if my Alliance is leading in VPs, it may be best to bid zero the majority of the time and one sometimes for Covert Aid.
Pros:
1. You are playing with the lead so probably have a good position and do not need aid as much as the other Alliance.
2. The other Alliance needs more help than you so may be willing to surrender VPs in the short term to build up their strength hoping to catch up with you eventually.
Cons:
1. You will not get any Equipment if your Alliance always bids zero or minimal equipment if you bid one.
2. Your opponents will, depending how willing they are to give up VPs, get more Equipment than you. This may eventuallt tip the advantage to their favor.
Since the VP differential seems to be tight in the couple of games we have played so far, I think if you can get a good lead it is best not to give it away during the Covert Aid phase by your Alliance bidding zero most of the time.
ANGOLA!

Ok, so what did I play at gameday you ask? "Angola!", with Nevin, Kent, and Steven. We decided from the start to play 8 turns as we know the game can run on the long side. The picture is of the end of the game. The Communist backed Alliance (FAPLA red chits played by me and the MPLA yellow chits played by Nevin) won by 1 VP. It was very close and could have easily ended in a draw or victory for the other side.
Nevin held on to Cabinda eventhough Steven (FPLA) made a concerted effort to take it. We managed to hold the middle third of the map feom the coast to the edge of the fluorescent light glare in the picture. On the last turn, the UNITA faction, Kent, went for the weakly defended towns in the Eastern part of the map.
The two most important battles on the last turn were for Cabinda and Benguela. Benguela fell to the UNITA faction on their portion of the turn but the FAPLA managed to take it back on their turn.
This is a very fun game with the only downside being the length of time to play.
Wednesday, July 31, 2013


Subscribe to:
Posts (Atom)